


Elfin
User Guide
Download Manual Document
Warranty Status
Check your product warranty
User Guide
Download Manual Document
Warranty Status
Check the warranty of your product
Troubleshooting & Support
1. Please ensure the remote control is within 10 cm of the device.
2. Press the “Return” and “Home” buttons on the remote control simultaneously until the indicator light begins flashing. This means that the remote control has entered pairing mode.
3. When a "Ding" sound is heard, the connection is successful.
Note: If the pairing fails, it will exit after 30 seconds. Please repeat the above steps after it exits.
No.
"XGIMI Assistant" works for none-android-based models, such as the XGIMI H2.
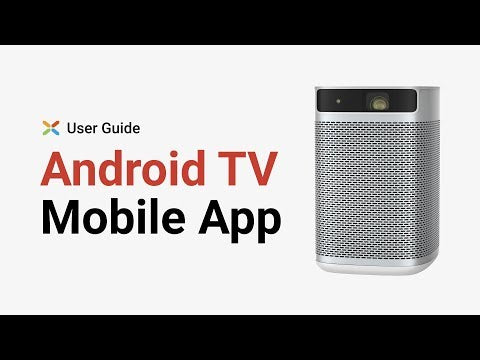
The XGIMI Elfin is installed with the official Google Android TV system. Therefore, the "Android TV" app is a better option:
Please download the "Android TV" app on your phone and pair it with Elfin, using the same WiFi connection. You can then use your phone as a remote.
Please refer to the video tutorial below:
Yes.
The XGIMI Elfin is installed with the official Google Android TV system. Therefore, the "Android TV" app is a better option:
Please download the "Android TV" app on your phone and pair it with Elfin, using the same WiFi connection. You can then use your phone as a remote.
For Android users, the XGIMI team is currently working on updating this feature; please stay tuned.
Please refer to the video tutorial below:
The XGIMI remote control makes everything simple:
1. Power button: powers the projector on/off.
2. Settings shortcut: access/adjust settings for 3D video setup, image quality, sound output, Keystone Correction, and more.
3. Voice control: allows you to use simple voice commands via Google Assistant to open apps, search for your favorite content, or play music.
4. Directional buttons: Provides simple navigation through the XGIMI UI.
5. Volume button: adjusts the volume up/down; also adjusts the manual focus feature.
6. Menu button: allows you to customize video settings.
7. Focus button: enables the autofocus feature; press and hold to enter the manual focus page.
8. Home button: returns to the home page from any screen.
9. Return button: quickly directs you back to a previous screen.
1: While playing a 3D compatible movie or video, click the “Shortcut” button on your XGIMI remote controller.
2: Select “3D Video Setup”
3: Choose the corresponding 3D mode.
4: When the images combine, and the display blurs, the 3D feature is enabled.
5: Adjust the buttons on your XGIMI 3D glasses until the image clears. Please also ensure that your XGIMI 3D glasses are fully charged.
Tip: For a better viewing experience, it is recommended that you use XGIMI 3D glasses.
Charging time: around 2-3 hours
Power on: Press the power button; A green LED light flash means the glasses have been turned on.
Power off: Long press the power button for 3 seconds; the green LED light will flash 3 times, and the glasses will power off.
Standby status: After 5 seconds without a 3D signal, the glasses will automatically switch to standby mode; the green LED light will also flash every 5 seconds.
USB charging: A red indicator light will appear when the glasses are charging and will automatically shut off once the glasses are fully charged.
Low battery mode: When the 3D glasses are low on battery, the green LED light will flash 5 times, then 2 times every 10 seconds, indicating the need for charging.
To enable the XGIMI 3D glasses:
1. Press once to power them on.
2. Press a second time to adjust the image quality, and continue pressing until the image is clear.
3. When playing videos on your projector, you need to choose the “up/down 3D” or “left/right 3D” effect to ensure an optimized viewing experience.
The XGMI Elfin features Chromecast built-in, allowing you to cast your favorite entertainment apps, movies, music, games, and videos from your Android or iOS devices. (Chromecast-supported apps).
Open media apps on your external device and search for the XGIMI Elfin to connect via Chromecast built-in.
The XGIMI Elfin is installed with the Official Google Android TV system, granting you full access to the Google service eco-system.
Please download "Google Home" on your Android device and connect it to the XGIMI Elfin using the same WiFi signal.Tap the screen-mirroring button on the Google Home app homepage.
Please refer to the video tutorial below:

For IOS device users, you can screen mirror via below steps:
1. Please install "MagiCast"app from Google Play Store or Desktop Manager app, it's a XGIMI self-developed tool
2. Start "MagiCast" on XGIMI Elfin
3. Open "Cast Screen" in any Iphone/Ipad/Macbook and make sure its under the same WiFi signal with the projector
For the wireless connections between the XGIMI Elfin & PCs
1. Please ensure your PC & XGIMI Elfin are using the same WiFi connection.
2. Open the Chrome browser on your PC and click the "Customize & Control" button in the upper right corner
3. Click "Cast" then search for the XGIMI Elfin to mirror the PC screen.
Please refer to the video tutorial below:

Yes.
The XGIMI Elfin also offers one HDMI port for external connections, making screen mirroring much easier for daily usage.
Please connect your external device via the HDMI port, and the XGIMI Elfin will automatically switch to the HDMI page.
For wireless connections between the XGIMI Elfin & PCs/Laptops:
1. Please ensure the PC/laptop & the XGIMI Elfin are using the same WIFI signal.
2. Open Chrome browser on the PC/laptop.
3. Click the "Customize & Control" button in the upper right corner, then "Cast".
4. Search for the XGIMI Elfin, then connect.
Please refer to the video tutorial below:
Yes.
The XGIMI Elfin offers one HDMI port for external connections, making audio transferring much easier for daily use.
Please connect the external device to the HDMI port, then follow the steps below to complete the setup:
1. Press the "Shortcut" button on the XGIMI remote control.
2. Enter "Sound Settings" -- "Sound Output" -- "Sound" -- "Output" -- "Internal speaker/SPDIF/ARC".
The XGIMI Elfin is installed with the official Google Android TV system, which offers 5000+ apps for daily entertainment. Customers are free to download any available apps from the Google Play Store.
If you can't find the desired app from the Play Store, it's recommended to install the application via a USB disk:
1. Please download the TV version of the APK file with your PC/laptop.
2. Copy the APK file to the root directory of the USB disk.
3. Connect the USB to the XGIMI Elfin, and locate the APK file to install it directly.
Yes.
The XGIMI Elfin supports both automatic vertical and horizontal keystone correction ( ±40 Degrees), allowing users to set up their device where they desire with incredible ease.
To enable automatic keystone correction:
Go to "Projector Settings" -- "Keystone Correction" -- "Auto Keystone Correction"
The throw ratio describes the distance from the lens to the screen (throw) to the screen width.
When the distance from the lens to the screen is the same, the smaller the projection ratio is, the larger the screen can throw.
Projection ratio: 1.2:1
The XGIMI Elfin projects up to 200 inches, which meets various projection requirements. Elfin features 600 ISO Lumens.
For the best viewing experience, we recommend using a 60-120"screen size.
Projection ratio: 16:9
Diagonal size:
38 inches @1m (1.8m*0.5m); 76 inches@2m (1.7m&0.9m); 114 inches@3m (2.5m*1.4m);
151 inches@4m (3.4m*1.9m); 189 inches@5m (4.1m*2.4m); 227 inches@6m (5m*2.8m)
The XGIMI Elfin will send a push notification of new firmware updates on the homepage. Select "Details" to begin updating the firmware.
If the notification is dismissed, please follow the steps below to check for new updates:
1. Please ensure your WiFi connection is stable.
2. Go to "Settings" -- "Device Preferences" -- "About" -- "System Update" -- "Check for update"
Tip: Please avoid stopping the update process or disconnecting the WiFi until it is complete.
1. Plug in the power supply and press Elfin's power button to begin the initial setup.
2. After finishing the initial setup, the Bluetooth remote has successfully paired.
3. You can now use the XGIMI remote control to power Elfin on/off within 5 seconds.
Tip: Unplug the power supply and long-press Elfin's power button for 3-7 seconds to turn off the projector completely.
When the Intelligent Screen Alignment feature is enabled, Elfin will automatically adjust the projected image to match a 16:9 or 16:10 screen size.
To enable Intelligent Screen Alignment:
1. Press the shortcut button on the remote control to enter the " Keystone Correction" page.
2. Select "Auto Keystone Correction" to enable the automatic keystone correction function.
3. For any further adjustment to the projection image, please select "Manual Keystone Correction" to adjust the four points and the size of the frame.
When the Intelligent Obstacle Avoidance feature is enabled, Elfin will automatically scale the projected image to avoid obstacles in the projection area.
To enable Intelligent Obstacle Avoidance:
1. Press the shortcut button on the remote control to enter the " Keystone Correction" page.
2. Select "Auto Keystone Correction" to enable the automatic keystone correction function.
3. For any further adjustment to the projection image, please select "Manual Keystone Correction" to adjust the four points and the size of the frame.
User Guide
Elfin Manual-English V1.0
2022/8/12 | 1.6 MB | English
Elfin Manual-French V1.0
2022/8/12 | 7.43 MB | French
Elfin Manual-German V1.0
2022/8/12 | 7.2 MB | German
Elfin Manual-Japanese V1.0
2022/8/12 | 2.12 MB | Japanese
Elfin Manual-Spanish V1.0
2022/8/12 | 6.84 MB | Spanish
Get Support from Us
Hours of operation (Central time): from 9:00am to 9:00pm during Monday to Sunday
Live Chat
What can we help with?
Call Us
Please tell us your issue
Email Us
Tell us how we can help
Can't reach us above? Contact our team directly at service-usa@xgimi.com.
Which devices do you need help with
Get support, find answers, download drivers, manuals, and more!

AURA

HORIZON Pro

HORIZON

Elfin

H2

Halo+

Halo

MoGo Pro+

MoGo Pro

MoGo

MoGo 2 Pro

MoGo 2

HORIZON Ultra

MoGo 3 Pro

Efin Flip

Halo+ (New)

AURA 2

MoGo 2 Plus

HORIZON S Pro

HORIZON S Max

$20
OFF
$15
OFF
It’s not too late! Use code at checkout to save on your purchase. Complete your order now!
Use code at checkout for a limited-time discount on selected projectors (MoGo 2, refurbished units not included). Copy now!