



If you want to move a TV show, live channel, movie, or game to a projector screen, start with the device that actually plays the content. Most modern TVs have HDMI inputs rather than a video output that can feed a projector. In most cases, you should connect the cable or satellite box, streaming device, game console, DVD player, or laptop directly to the projector.
A projector can create a much larger and more immersive viewing experience than a typical TV screen, especially in a home theater setup with controlled ambient light. This guide explains how to choose the right signal path, connect the source, select the correct input, improve picture quality, and show the same image on both a TV and projector when needed.
Choose the Right Signal Path First
Check what your TV can actually output
Read the label beside each port on your TV.
HDMI IN accepts video from another device. HDMI ARC or eARC normally sends audio to a compatible soundbar or receiver. Neither means that the TV sends its displayed image to a projector.
Many modern TVs only have HDMI input ports. Unless your TV has a documented video OUT connection, the better solution is to identify the original input source:
- Cable box
- Satellite box
- TV tuner
- Streaming device
- DVD or Blu-ray player
- Game console
- Laptop
A TV tuner is required for broadcast signals, while a cable box or satellite box can send live TV directly to a projector through HDMI.
If your goal is simply to watch TV content on a projector screen, move the source device rather than trying to mirror the TV panel. XGIMI's guide to watching TV without a cable box covers additional source options.
Match the connection to your viewing goal
For one projector, connect the source HDMI OUT to projector HDMI IN.
To show the same image on a TV and projector, place a compatible HDMI splitter between the source and both displays.
If a long visible cable is inconvenient, wireless HDMI may be an option, although performance can be affected by walls, distance, and interference.
Phone or laptop mirroring is useful for photos and presentations, but protected streaming video may not always mirror reliably.
Older devices may also use VGA or component video. VGA carries analog video, while component video can provide better quality than VGA. For most modern projector setups, however, HDMI remains the simplest connection for both video and audio.
For picture quality and delay trade-offs, compare XGIMI's wired and wireless connection guide.
Connect and Test the Projector
Cable box, satellite box, tuner, or game console
1. Turn off the source device and projector. Connect the source's HDMI OUT to an HDMI input on the projector.
2. Power on the source, then the projector. Select the HDMI input that matches the physical port you used.
3. Open the source menu before testing a live channel, Netflix title, movie, or game. If the menu appears but protected video does not, the connection itself may be working and the issue may involve app or content-protection requirements.
4. If the screen remains blank, set the source to a resolution and refresh rate supported by the projector. Starting with 1080p at 60 Hz is a useful troubleshooting step when available.
5. Check the aspect ratio. Incorrect settings can create black bars, stretch the image, or prevent the projected image from filling the screen correctly.
After the signal works, adjust focus, zoom, and picture settings.
For the best image quality, keep the projector reasonably centered with the projection surface when possible. Extreme projector angles require more keystone correction, which can reduce effective image resolution.
Before ceiling mounting or hiding cables, test the complete setup and confirm that the image fits the screen correctly.
Streaming device or built-in app
If your XGIMI projector already supports the streaming app you want, sign in on the projector and test playback first.
Otherwise, connect a compatible streaming device to HDMI, power it according to its instructions, select that HDMI input, and complete Wi-Fi and app setup on the streaming device.
The streaming device—not the TV screen—sends the video to the projector.
If you need help choosing an external source, see XGIMI's projector streaming-device guide.
Show one source on a TV and projector
If you want both displays to show the same content, connect:
Source HDMI OUT → HDMI splitter → TV + Projector
Make sure the splitter and both displays support the resolution and refresh rate you want.
If the TV works but the projector stays black, set the source to a format both displays support. A TV may support a higher resolution or refresh rate than the projector.
Use a powered HDMI splitter rather than a passive adapter, and test the full connection before installing cables permanently.
Add Wireless Viewing and External Sound
Wireless HDMI transmits the output of a source through a transmitter and receiver. It does not turn an HDMI input on a TV into a video output.
Keep both units powered and reduce obstacles between them. Test the connection at the actual viewing distance before finalizing the setup.
For phone or laptop casting, connect compatible devices to the same network and follow the cast instructions. XGIMI's AirPlay instructions can help where that feature is supported.
For gaming or fast-moving sports, direct HDMI is usually more predictable because wireless connections can introduce additional delay. See XGIMI's casting-versus-HDMI comparison for more detail.
You should also decide where audio will come from.
Many projectors have built-in speakers, which may be enough for casual viewing. For a more immersive home theater setup, use a soundbar, external speakers, or a separate audio system.
If you connect a soundbar, check which device controls the audio output and whether the relevant HDMI port supports ARC or eARC. XGIMI's soundbar setup guide explains the available options.
Improve Picture Quality on the Projector Screen
Getting video onto the screen is only part of the setup.
A TV emits light directly from its display panel, while a projector sends light onto a separate screen or wall. That light is then reflected toward the viewer.
Because of this, ambient light, screen size, projection surface, and projector placement have a much larger effect on projector performance.
For better picture quality:
- Reduce ambient light around the screen.
- Avoid direct light from windows hitting the projection surface.
- Use the correct resolution and aspect ratio.
- Adjust focus before relying on digital correction.
- Avoid extreme projection angles.
- Choose appropriate brightness and contrast settings.
- Adjust color temperature if the image looks too warm or cool.
- Keep the lens clean.
- Use a suitable projector screen where possible.
A projector screen provides a more consistent projection surface than many painted walls and can improve perceived brightness, contrast, and color accuracy.
Projectors also have an advantage in scale. Many projectors can produce images from around 80 inches to more than 150 inches, while most TVs are much smaller. A 120-inch projected image can create a much more immersive viewing experience for movies, sports, and gaming.
Match the Screen to Your Room
The right screen depends on your projector, room, and lighting conditions.
A standard white projection screen works well in a dark or dim room because it reflects projector light evenly.
If the room has significant ambient light, ambient light rejecting screens can help reduce interference from windows, ceiling lights, and other unwanted light sources.
ALR screens are useful for mixed-light environments, but screen type must match projector type.
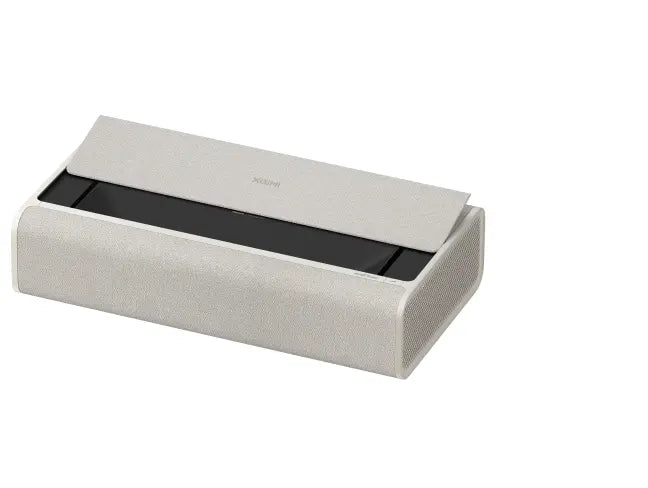
Ultra-short-throw projectors, for example, usually require screens designed for the steep angle of light produced by a UST projector. A standard ALR screen may not deliver the expected result.
Other options include:
- Fixed screens for permanent home theater setups
- Retractable screens for multipurpose rooms
- Acoustically transparent screens that allow sound from speakers behind the screen to pass through
- A smooth wall for simple or temporary setups
A wall can work, but paint color, surface texture, and reflected light can affect image quality. A dedicated projection screen generally provides more predictable results.
Control Ambient Light for Better Viewing
A projector is most rewarding when the room works with the projected image rather than against it.
TVs provide bright, plug-and-play performance in a wide range of rooms. Modern OLED and Mini-LED TVs can also deliver high contrast and deep blacks.
Projectors depend more heavily on lighting conditions.
If too much light reaches the screen, the projected image can look washed out even when projector brightness is high.
For better viewing:
- Close curtains or blinds.
- Dim unnecessary lights.
- Keep direct sunlight off the screen.
- Avoid placing the screen directly opposite bright windows when possible.
- Reduce light reflected from bright walls or glossy surfaces.
- Use an appropriate ALR screen when the room cannot be darkened.
You do not always need a completely dark room. Casual TV, sports, and gaming may work well with moderate light control. Movies with dark scenes usually benefit more from a dim room because better light control improves perceived contrast and black levels.
Troubleshoot a Blank or Unstable Picture
If the projector shows no image, work from the simplest connection outward.
First display the projector's own menu to confirm that the projector is operating.
Then:
1. Select the correct input source.
2. Confirm that the cable box, satellite box, console, laptop, or streaming device is powered.
3. Reseat both ends of the HDMI cable.
4. Test another HDMI cable or input if available.
5. Set the source to a supported resolution.
6. Check the refresh rate and output format.
7. Remove any splitter, HDMI switch, or wireless device.
8. Connect the source directly to the projector.
If direct HDMI works, reconnect other devices one at a time.
If the source menu appears but a movie or streaming title stays blank, check app support and protected-video requirements.
If you have picture but no sound, test the projector's built-in speakers and inspect the source's audio settings.
XGIMI's HDMI No Signal troubleshooting guide provides a deeper connection check.
Final Setup Check
For reliable TV to projector screen viewing, identify the real video source first.
Connect the cable or satellite box, streaming device, game console, DVD player, or laptop to the projector, select the matching HDMI input, and confirm that resolution, aspect ratio, video, and audio all work correctly.
Then optimize the viewing environment. Reduce ambient light, align and focus the projector, select suitable picture settings, and choose a projection surface that matches the room.
Add an HDMI splitter, wireless connection, external speakers, or permanent mounting only after the direct connection works.
The best projector setup combines the right source connection, projector screen, room lighting, image settings, and audio to create a larger and more immersive viewing experience without making the system unnecessarily complicated.
FAQs
1. Can I connect a TV directly to a projector screen?
Only if the TV has a documented video output compatible with the projector. Most modern TVs use HDMI as an input, so connect the original source device to the projector instead.
2. What is the simplest way to watch live TV on a projector?
Connect the cable box, satellite box, or TV tuner HDMI output directly to the projector's HDMI input, then select the correct input source.
3. Can I show the same image on a TV and projector?
Yes. Use a compatible powered HDMI splitter. Connect the source to the splitter, then connect one output to the TV and the other to the projector.
4. Why does the TV work while the projector stays black through a splitter?
The TV and projector may not support the same resolution, refresh rate, or protected-content format. Test the projector directly with the source first, then reconnect the splitter using a format both displays support.
5. Is HDMI the best connection for a projector?
For most modern setups, yes. HDMI carries digital video and audio through one cable and is widely supported by projectors, cable boxes, streaming devices, laptops, and game consoles.
6. Does a projector screen improve picture quality?
A purpose-designed screen can provide a more consistent surface than a wall and may improve perceived brightness, contrast, and color accuracy.
7. Do I need an ALR screen?
Not always. A standard screen can work well in a dim room. An ALR screen becomes more useful when ambient light cannot be fully controlled.
8. Can I use a wall instead of a projector screen?
Yes, especially for casual viewing. However, wall texture, paint, and color can affect brightness and image quality.


